Quick Start Guide
This tool is designed for post-producers, cinematographers, editors, DITs, and content creators who need to visualize aspect ratios, create custom mattes, and simulate sensor crops with mathematical precision.
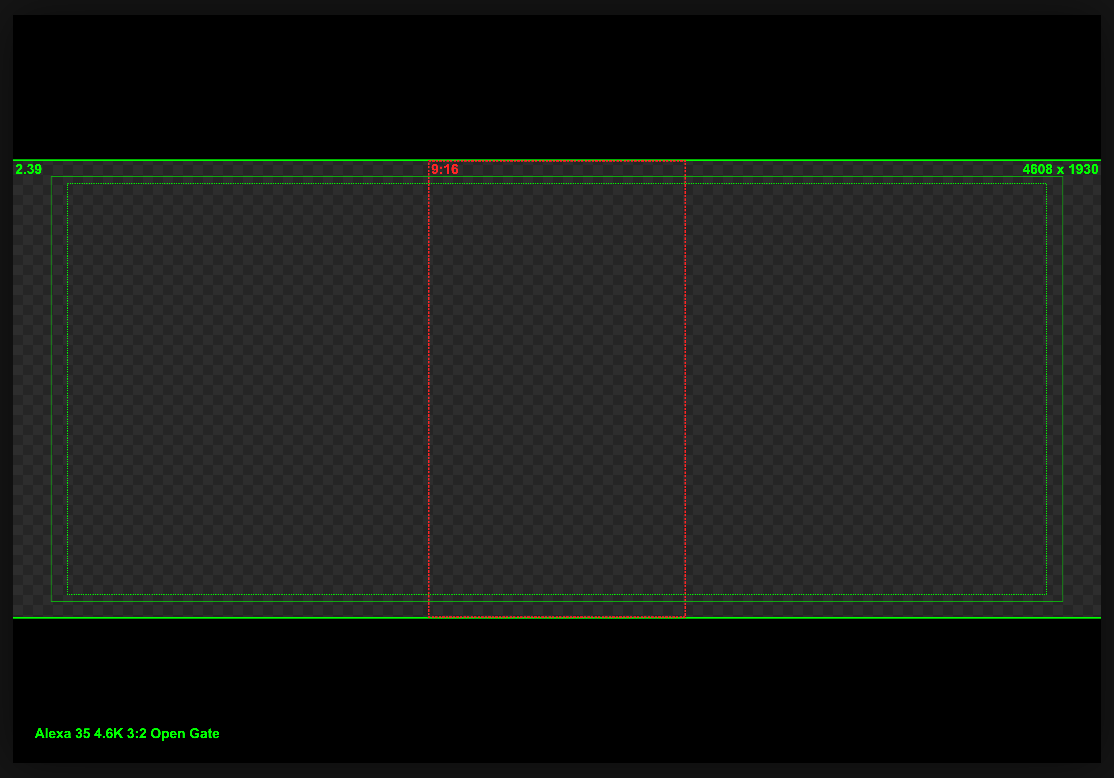
Frameline with secondary frameline.
1. Basic Concepts
There are two primary ways to utilize this tool:
A. Overlay Generator
Design custom aspect ratio guides and export high-resolution transparent overlays compatible with all editing software.
You can set your aspect ratio and resolution, then export a clean, transparent PNG with the matte and frame guides. This is perfect for importing into Premiere Pro, DaVinci Resolve, or Avid as a timeline overlay.
B. Visual Preview
Choose a file from your device to visualize framing.
Drag and drop a still or click to select a file from your computer. This allows you to check compositions, simulate sensor crops, and verify safety areas against your actual footage.
Choosing a local file for visual preview.
2. Scaling Modes
When using an image, you have three ways to visualize your shot within the desired aspect ratio:
- Scale to Fit: Displays the entire original image. The image stays centered and fully contained within the canvas, adjusting automatically to any resolution change.
- Scale to Fill: Zooms in until the frame is filled. Use the Position controls to reframe your shot (Pan & Tilt) into the desired aspect ratio.
- Crop to Aspect Ratio: Physically adjusts the canvas size. The final exported file matches the exact dimensions of the active frame, eliminating any black bars.
Scaling modes.
3. Scale and Position
Frameline Scale
Adjusts the guide size relative to the canvas. Essential for visualizing safety margins for stabilization and VFX (look-around area). When combined with Position controls, it enables precise reframing to extract alternate aspect ratios from a master shot.
Position
Controls the X/Y axis alignment. Critical for Pan & Scan workflows, enabling you to re-center the subject when cropping wide footage into narrower aspect ratios (like 9:16) or adjusting headroom.
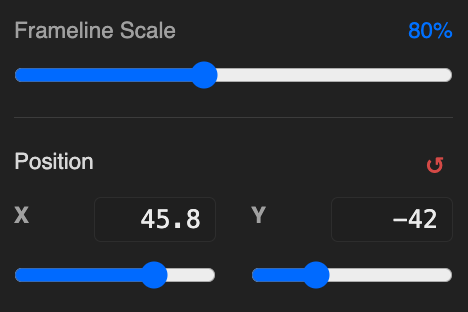
Scale and Position sliders.
4. Advance Options
Expand the "Advanced" panel to fine-tune the technical details of your overlay:
- Matte Opacity: Controls the transparency of the outer mask. Set to 100% for a solid black letterbox (hard matte), or use lower values to visualize the "look-around" area while maintaining the framing reference.
- Line Appearance: Customize the Color and Thickness (in pixels) of the main guide to ensure maximum visibility against your footage.
- Safe Areas: Toggles standard broadcast safety margins—Action Safe (93%) and Title Safe (90%)—to ensure critical elements aren't cut off on consumer displays.
- Social Safe Zones: Displays framing-safe zones for vertical, mobile-delivered content from social media UI overlays (captions, buttons, avatars) on platforms like Instagram and TikTok.
- Data Labels: Displays the Aspect Ratio (e.g., "2.39") and Resolution (e.g., "1920 x 804") text directly on the overlay. Essential for DITs and Editors to avoid confusion in post-production.
- Canvas Resolution Label: Burns the total canvas size (e.g., "Canvas: 1920 x 1080") into the bottom-left corner. Useful for documenting delivery specs.
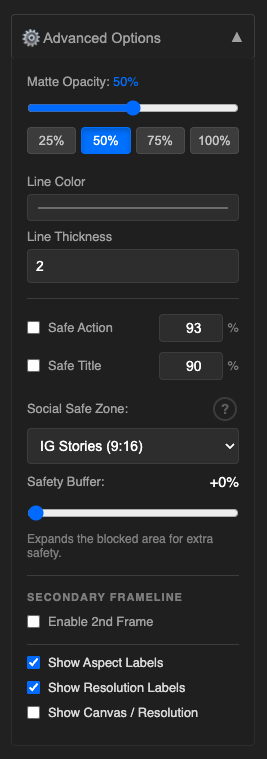
Advance Options.
5. Canvas Preset
The Canvas Preset automatically sets the frameline aspect ratio to match your current Resolution dimensions exactly. This is useful for visualizing the full "Open Gate" area or verifying the total canvas size without any matte obstruction.
6. Secondary Frameline
Need to deliver for Cinema (2.39) and Instagram (9:16) simultaneously? Enable the "Secondary Frameline".
You can customize the color and aspect ratio. Checking "Fit inside main frameline" ensures the secondary guide stays relative to your active crop.
Secondary Frameline.
7. Export
Once satisfied, click the download button. The tool automatically selects the optimal format based on your content:
- Overlays (No Image): Exports a Transparent PNG. Perfect for dragging directly into Premiere, Resolve, or Avid timelines.
- Visual Previews (With Image): Exports a JPG with minimal compression (High Quality). This ensures your reference image retains maximum detail and color fidelity for sharing or documentation.